Tapping Vention Extrusions
This guide covers how to tap the ends of Vention extrusions.
Step 1: Setting up your tools
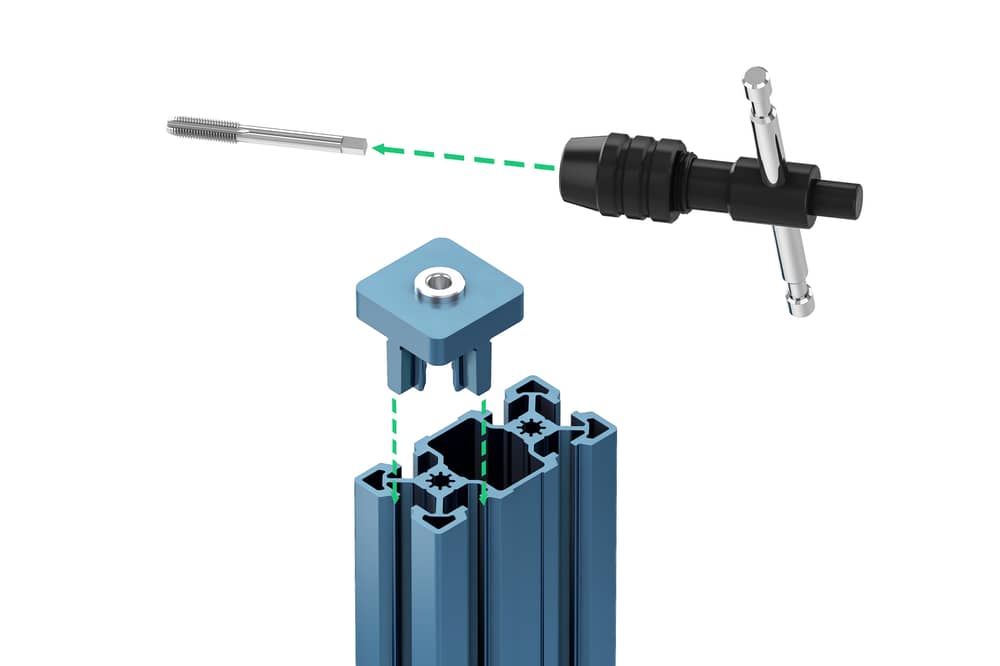
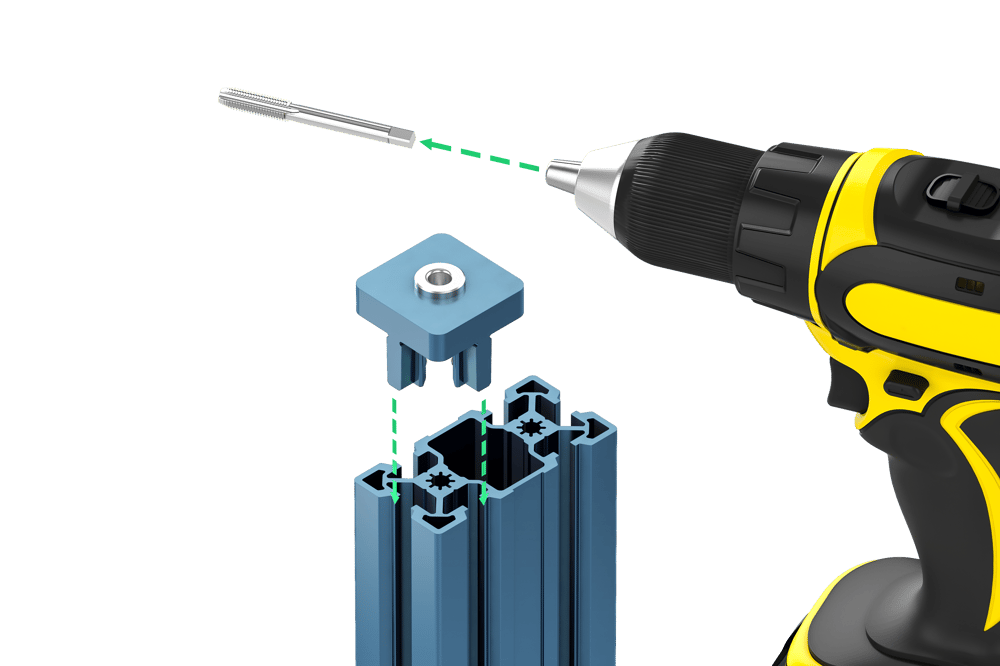
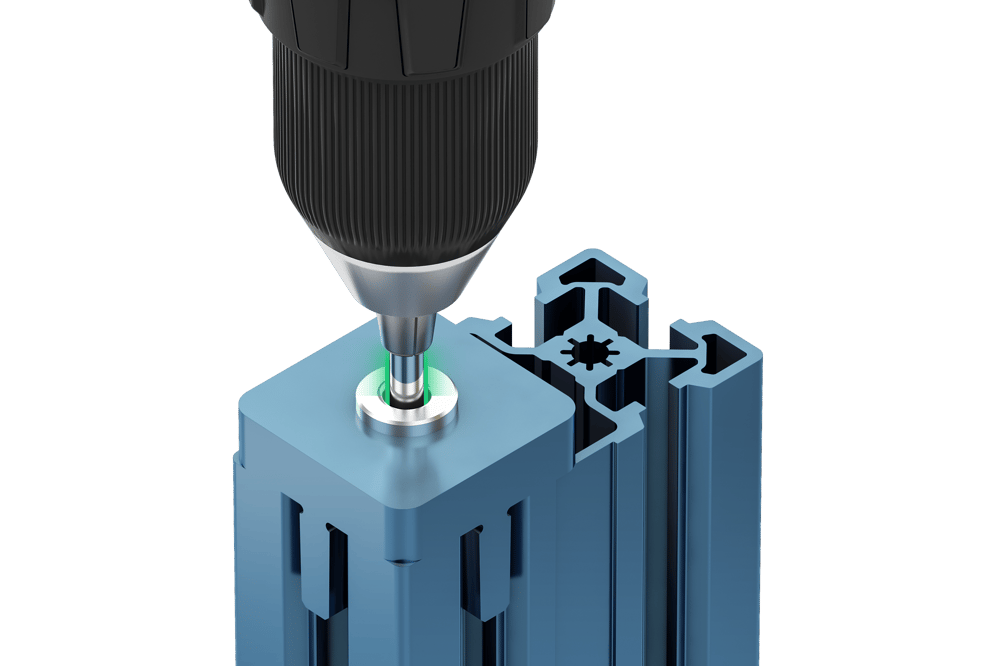
Begin by installing your M8 x 1.25-mm tap (HW-TL-001-0001) into your tap handle (HW-TL-003-0001). Make sure the square end of the shank is fully inserted into the handle. If you are using an electric drill, install the cylindrical portion of the tap’s shank in the chuck and secure it. Make sure the chuck is properly tightened and the tap is perpendicular to the face of the chuck.
Next, install the guide tool (HW-TL-008-0001) on the end of the extrusion by sliding the tool into the extrusion’s t-nut slots. Make sure the guide tool’s face is in contact with the extrusion’s face.
Finally, lubricate the tap and cutting surface. Coat the tap and hole with tapping fluid (HW-CS-004-0001) and make sure the tap is free of chips. Re-coat the tap with cutting fluid before tapping every new hole.

Step 2: Tapping your extrusion
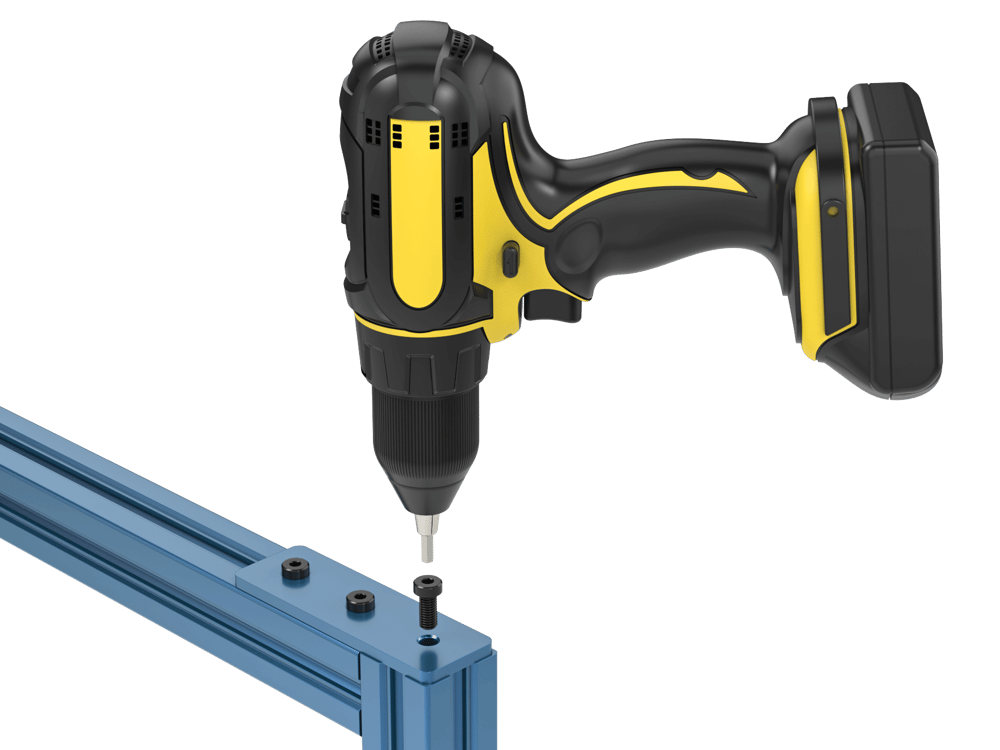
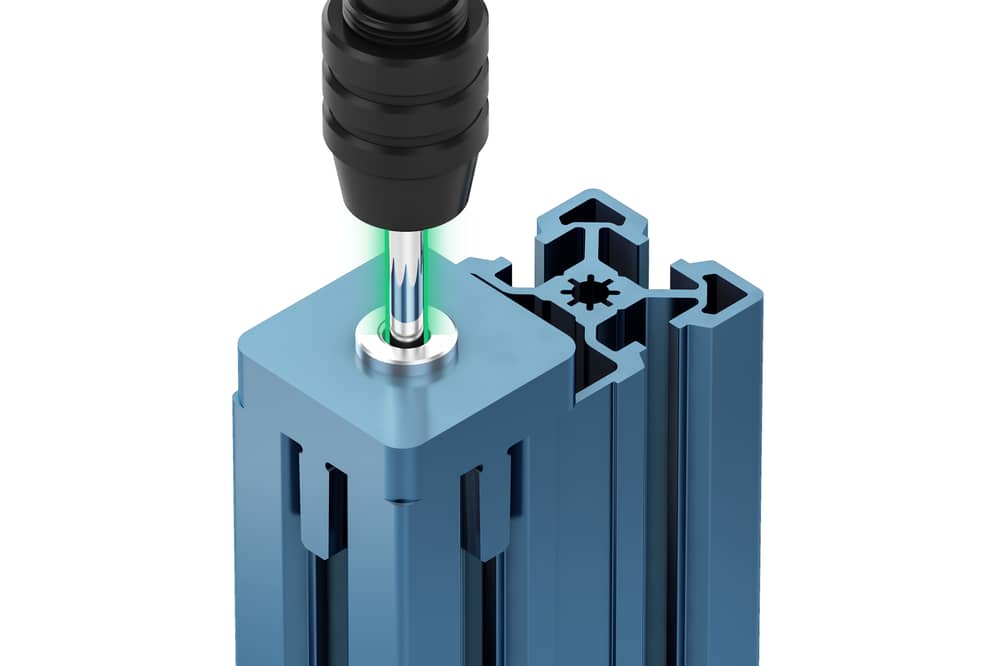
The next step is to tap the end of the extrusion. Once the lubricated tap and the guide tool are properly installed, insert the end of the tap into the guide until it interfaces with the splined hole. If you are using the guide tool, make sure the tap is positioned properly within the drill bushing. If you are not using the guide tool, make sure the tap is fully perpendicular to the face of the extrusion, and properly positioned in the tool, before you proceed with tapping.
Begin tapping the extrusion by turning your tap handle clockwise or by triggering the forward drive on your drill. Apply constant compressive force in line with the tap, and make sure the tap stays perpendicular to the face of the extrusion. (This is easier with the guide tool.)

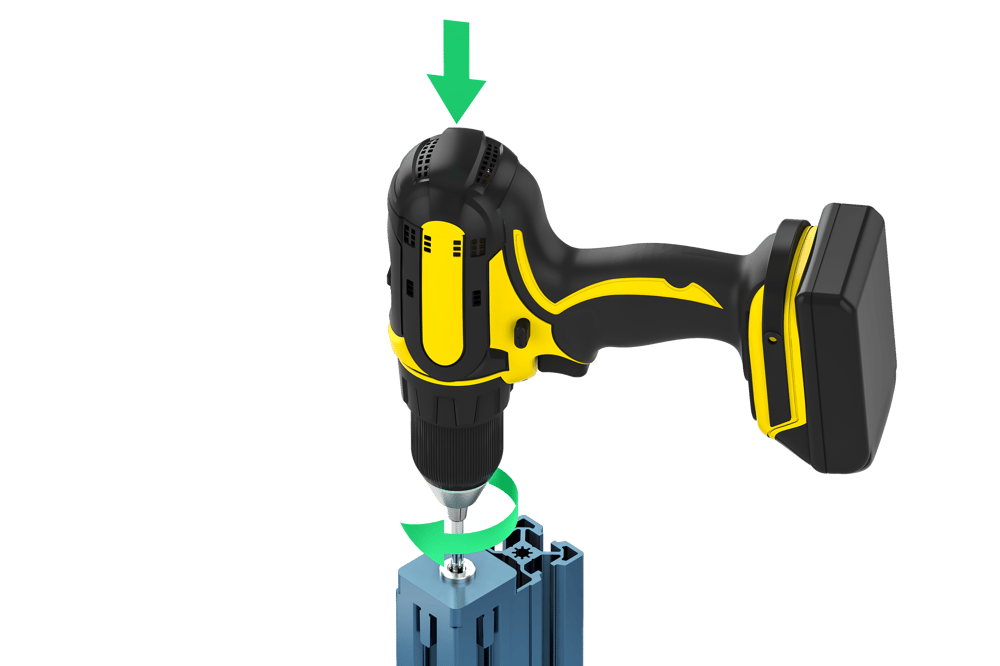
Taps tend to be brittle, so never apply excess force if the tap starts to stick in the extrusion. While tapping, ensure that the tap stays perpendicular to the face of the extrusion at all times.
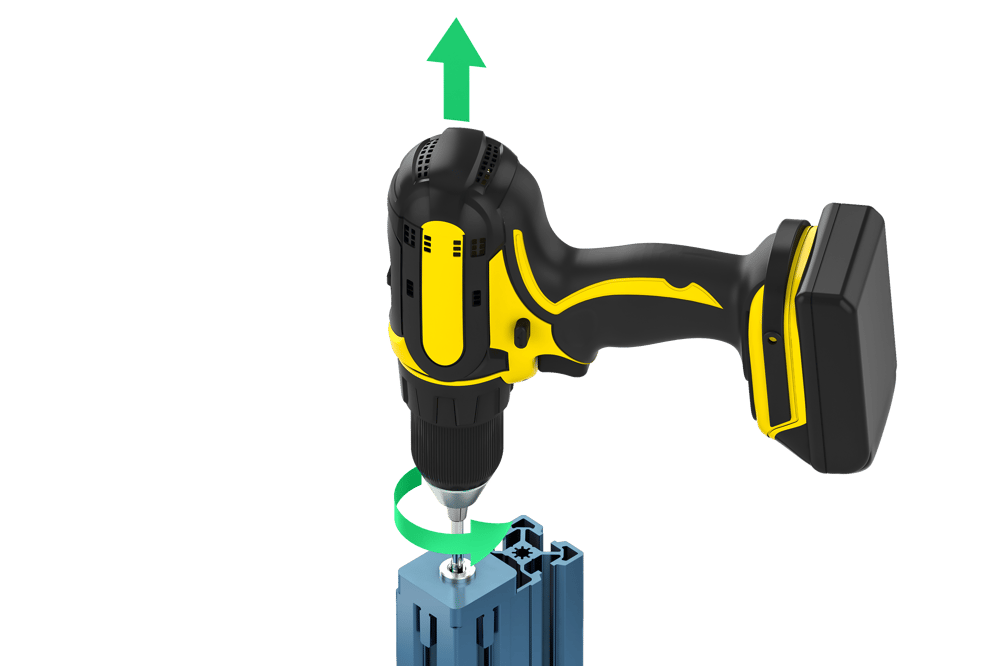
If the tap starts to go in at an angle (no longer perpendicular to the extrusion face), or gets jammed, reverse the direction of your tap handle or drill and retract the tap by 5 mm, or until it is no longer stuck. Once unstuck, reposition the tap perpendicular to the face of the extrusion and continue tapping.
Tap the extrusion as deeply as necessary to attain 25–30 mm of thread cut into the extrusion. Once the extrusion is fully tapped, reverse the direction of your tap handle or drill and retract your tap from the hole.

Step 3: Clean up and examine
Once the extrusion is fully tapped, clean up by removing excess chips from the extrusion, tap, and surrounding environment. Use the tap-cleaning brush (HW-TL-009-0001) to clear chips from the threads within the extrusion.
When everything is neat and tidy, test your newly threaded extrusion by threading in an M8 screw. If the screw does not engage properly with the threads, re-tap your extrusion and ensure the tap is fully perpendicular to the extrusion face and inserted properly in the guide tool.
To tap your next extrusion, repeat steps 1 to 3, again making sure to freshly lubricate the tap and check that the guide tool is properly installed.

Tapping without a tap kit
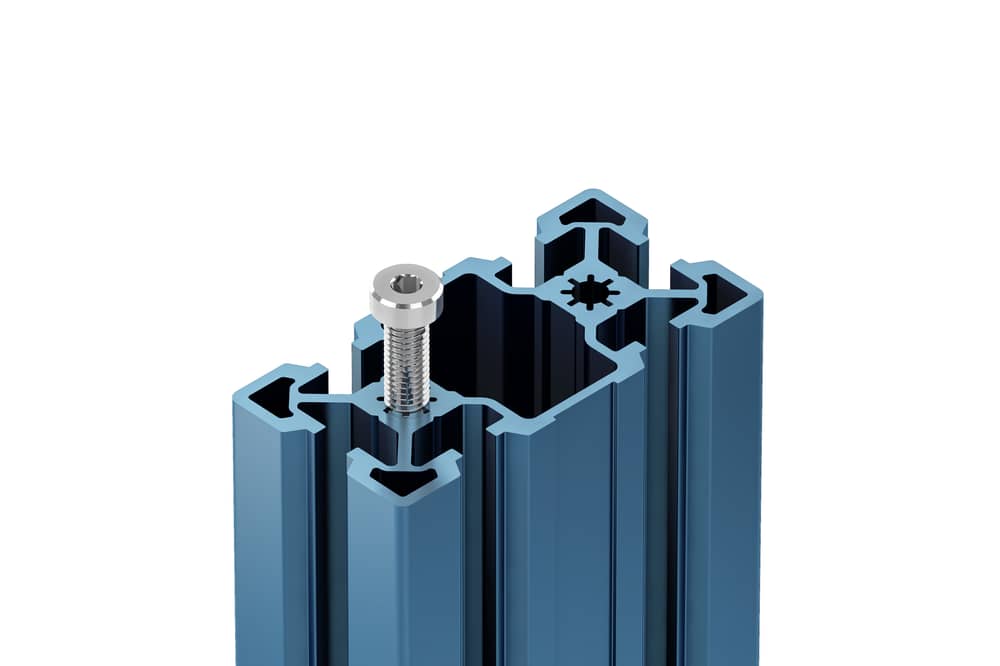
All Vention extrusions are capable of being tapped without the use of a tap. To do so, you will need a 5 mm Allen key and an M8 Bolt (both Vention standard). Simply put your bolt through your assembly plate or gusset and then start turning the screw. You will need to apply some downward pressure onto the bolt to get it to grip the extrusion. This forms the thread around the bolt and creates a strong joint.
We recommend using a drill or impact driver to self tap extrusions, making the process easier and quicker. Using this method speeds up assembly, since pre-tapping the holes is not required.