EPSON SCARA Integration Guide
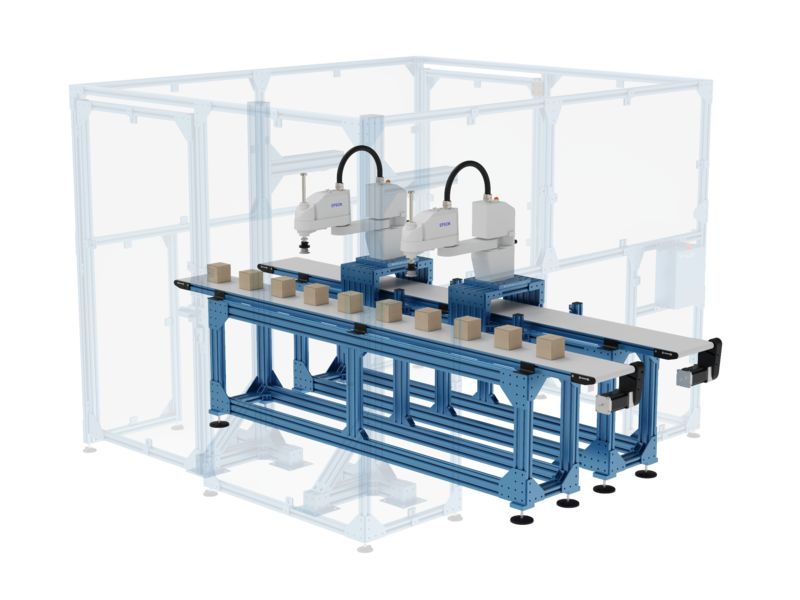
This document provides an overview of the integration and setup for an EPSON T-Series SCARA Robot for a Pick & Place application using a vacuum gripper. The following sections will guide you through the integration process of the robot base, the end-of-arm tool and the programming of your EPSON robot cell.
Robot Base
Depending on your design, there are multiple ways to secure your robot in place. Simply follow the assembly instructions provided with your order to build your station or machine. Install the appropriate robot mounting plate at the chosen robot location, and attach the robot on it using the provided fasteners.
End-of-Arm Tool (EOAT)
A typical pick and place application requires a vacuum EOAT. Since SCARA robots are commonly used for such applications, Vention has developed a full solution for a vacuum gripper to be used with these robots. This ready-to-deploy solution can be customized to handle a wide range of products.
Mechanical Assembly
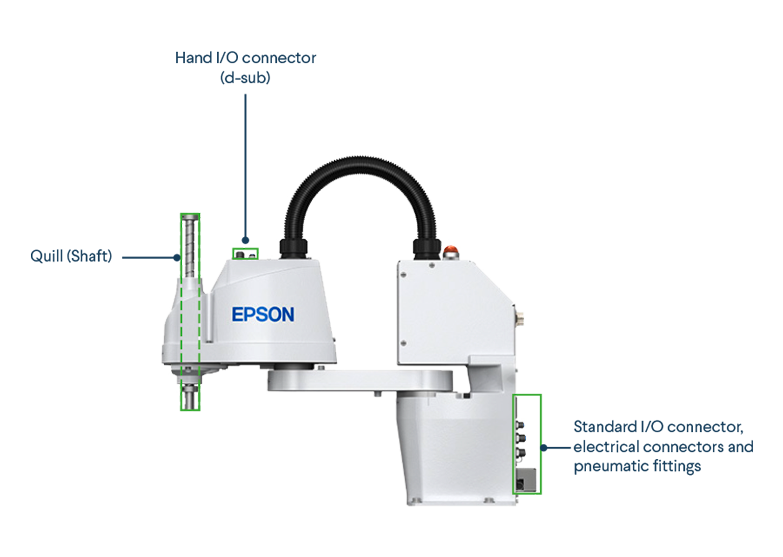
The T-Series robots have a quill, also known as a shaft, that can move vertically and rotate around the Z-axis. To mount a tool onto this quill, you will need a quill adapter. Vention offers Millibar’s ISO 50 quill adapters for the EPSON T-Series. The adapter allows you to use common grippers in the industry and maybe even repurpose one you already have.
Vacuum grippers for SCARA robots often consist of a single suction cup. We recommend using Vention’s single cup mount for an easier installation and fully compatible solution. For the suction cup selection, you will have to determine the right material, shape and size to handle your workpiece. The most common suction cups can be found in Vention’s library and fixed to the single cup mount.
To bring your pneumatic system to life, you will need to install the following Vention parts:
-
Tubing
-
Tubing adapters or fittings
-
Safety equipment (if applicable)
-
Accessories (if applicable)
In the next section, you will learn how to connect these devices together.
Electrical & Pneumatic Connections
The T-Series robots from EPSON have a built-in controller and offer internal I/O wiring and pneumatic tubing, allowing you to minimize the cabling and tubing around the robot. You can find two (2) I/O terminals on the robot: the Standard I/O and the Hand I/O.
-
The Standard I/O is used for any device installed around the robot (stack lite, actuators, etc.)
-
The Hand IO is used for the end-of-arm tool. Only the Hand I/O has a 24V input, so make sure to choose the proper terminal for your application. If you are using an electric gripper, make sure the power supply from the robot is enough to activate your gripper (e.g. 500 mA for the T3). If not, you will need an external power supply.
Here are the 10 easy steps to connect all your equipment together:
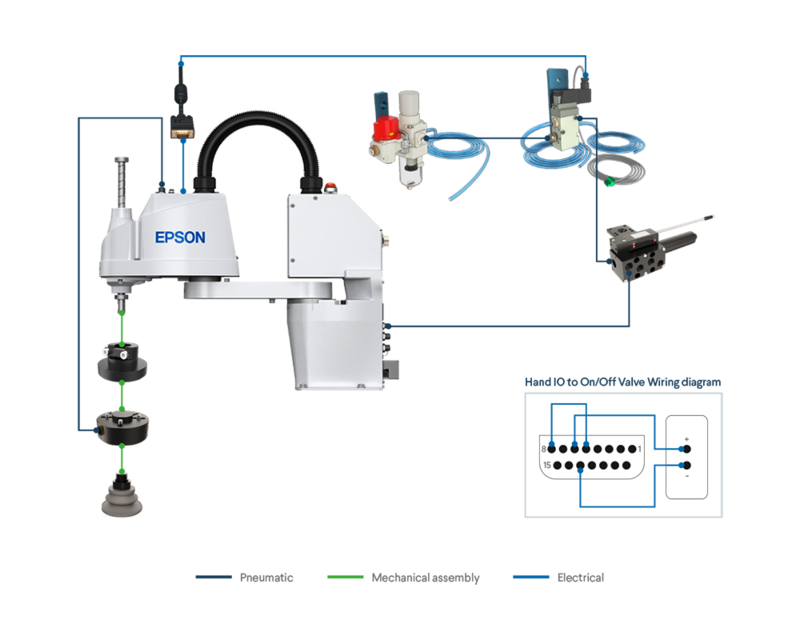
- Attach and secure the quill adapter onto the robot’s quill.
- Attach the chosen EOAT to the adapter, using the provided fasteners.
- Connect the tubing between the pneumatic EOAT and the pneumatic port (6mm OD) on the top of the robot (next to the Hand I/O terminal). Try to minimize the length of this tube so it does not interfere with the movement of your robot. For a single suction cup mount, use 600mm of tubing. If needed, use a 6-to-8mm OD tubing adapter to connect the EOAT with the robot.
- Install the multi-port venturi on the structure, as close as possible to the robot, and connect the tubing between the main pneumatic input at the base of the robot and the venturi. If needed, use a 6-to-8mm OD tubing adapter to connect the EOAT with the robot.
- Install the on/off pneumatic valve next to the venturi and connect the two with another tubing length.
- Install the air preparation station next to the on/off pneumatic valve and connect the two with another tubing length.
- Connect your air preparation station to your compressor or air supply. You now have completed the pneumatic setup.
- For the electrical installation, connect the d-sub adapter to the hand IO terminal. Connect the on/off pneumatic valve to the d-sub adapter and attach the electrical cable along the black tubing on top of the robot. See wiring diagram above for reference.
- Connect your robot to a power supply.
- Connect your robot to your computer. You are now ready to program your robot.
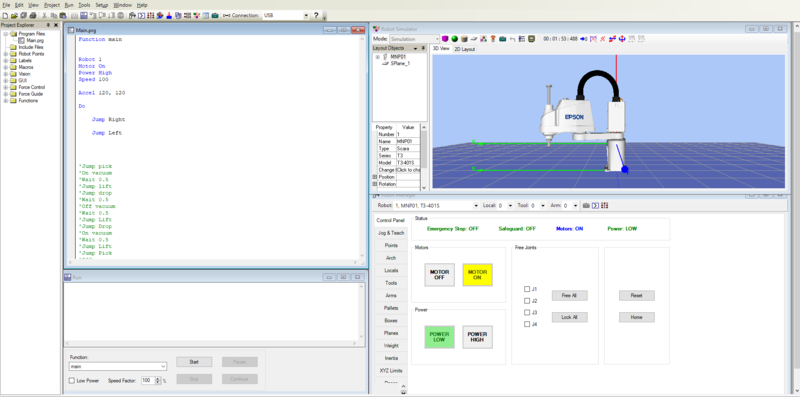
Programming
All the programming with EPSON is done through the RC+ software. It’s an easy and simple software that allows you to call simple commands and more complex actions, while offering a lot of features. You can create your program before receiving your robot by using the simulation tool. RC+ also allows you to add CAD files to the virtual 3D environment around the robot. This full simulation can help you deploy your system with confidence. You can download a simple pick & place program template here.