Multi-Controller Support for MachineMotion
Contents
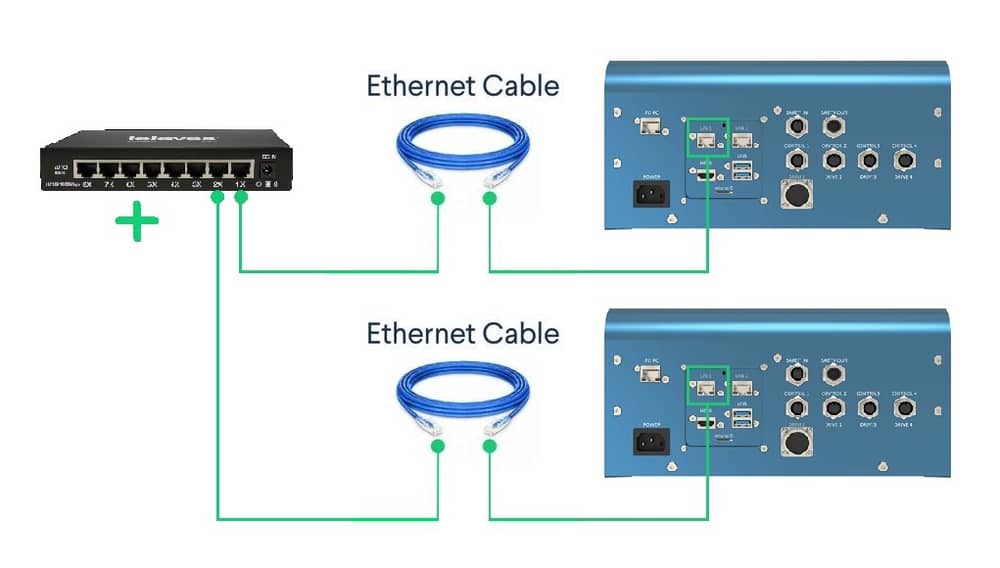
MachineMotion 2 now supports connecting up to 8 controllers together to expand the number of configurable drives available in a single system. This is achieved by connecting all relevant MachineMotions in the system to a central Ethernet Switch or Router (purchased separately).
To set up a Multi-Controller system, follow Steps 1 through 3 of the Power on and set-up section in the MachineMotion 2 User Manual for each controller, followed by the Network Connection configuration found below.
Connecting Controllers using an Ethernet Switch or Router
When connecting to an Ethernet Switch or Router, each LAN1 port of each MachineMotion controller in the system must be configured to different IP addresses, but to the same subnet. The LAN2 port of each controller also need to be configured in Dynamic Mode, to ensure that each LAN2 port has a unique address on the network that doesn’t collide with the addresses set for each LAN1 port.
Example of Network Configuration
LAN 1
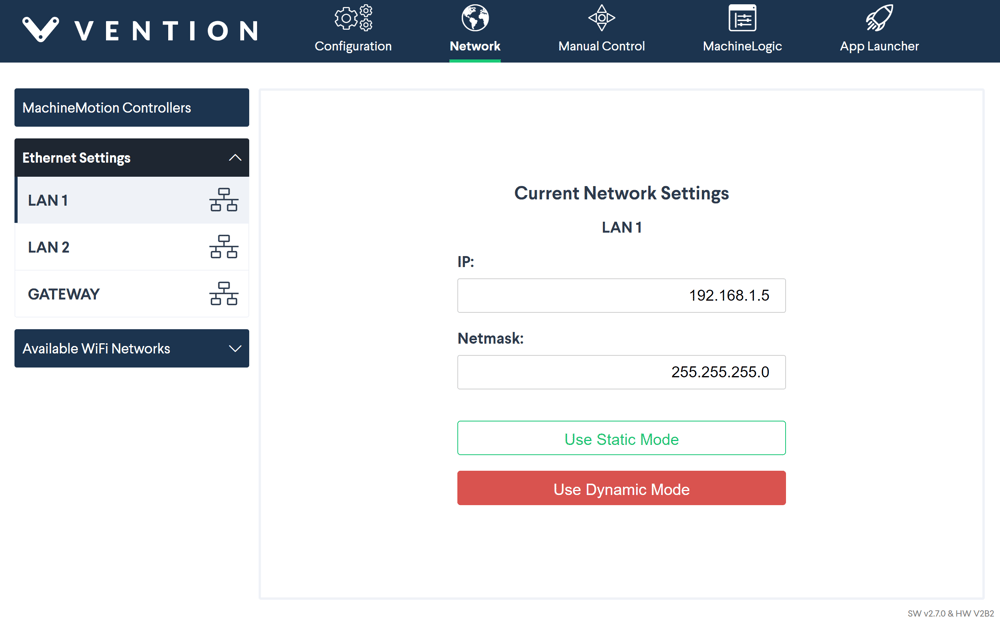
If connecting to a Switch
- IP: Set to different IP, with the same subnet, for each MachineMotion (e.g. 192.168.1.3, 192.168.1.4, 192.168.1.5, etc.)
- Note: to avoid any conflicts, do not set the IP to 192.168.1.2 as that address is reserved as the default for all newly added controllers.
- Netmask: 255.255.255.0
- Then click: Use Static Mode
If connecting to a Router
- Click: Use Dynamic Mode
- Similarly to above, ensure that the IP is not set to 192.168.1.2.
LAN 2
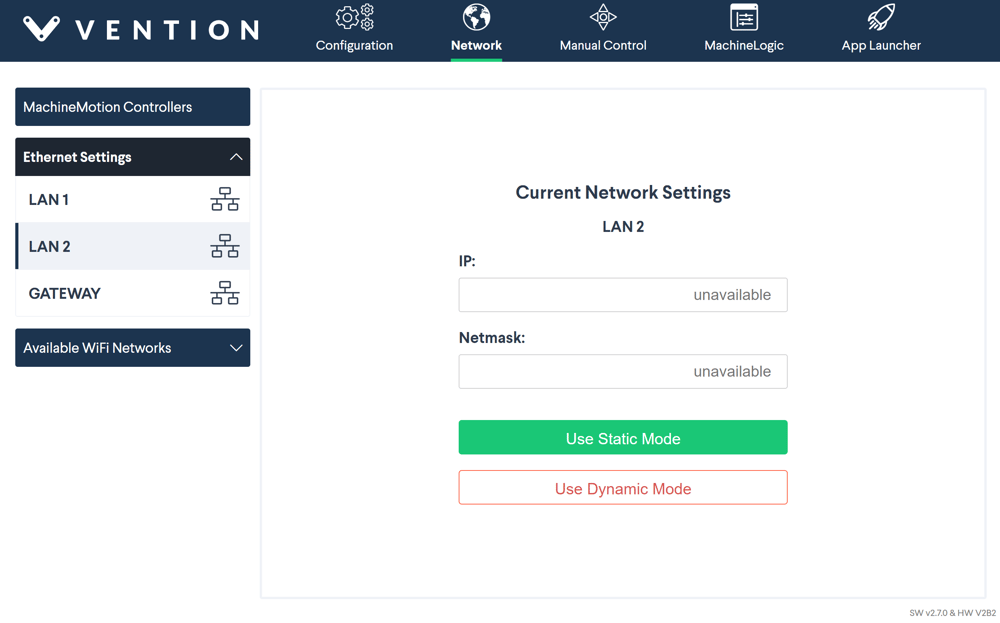
When connecting to a Switch or Router
- Click: Use Dynamic Mode
Once the Network Connection configuration is complete, simply connect a standard Ethernet Cable from the switch/router to the LAN1 port of each MachineMotion controller in the system.
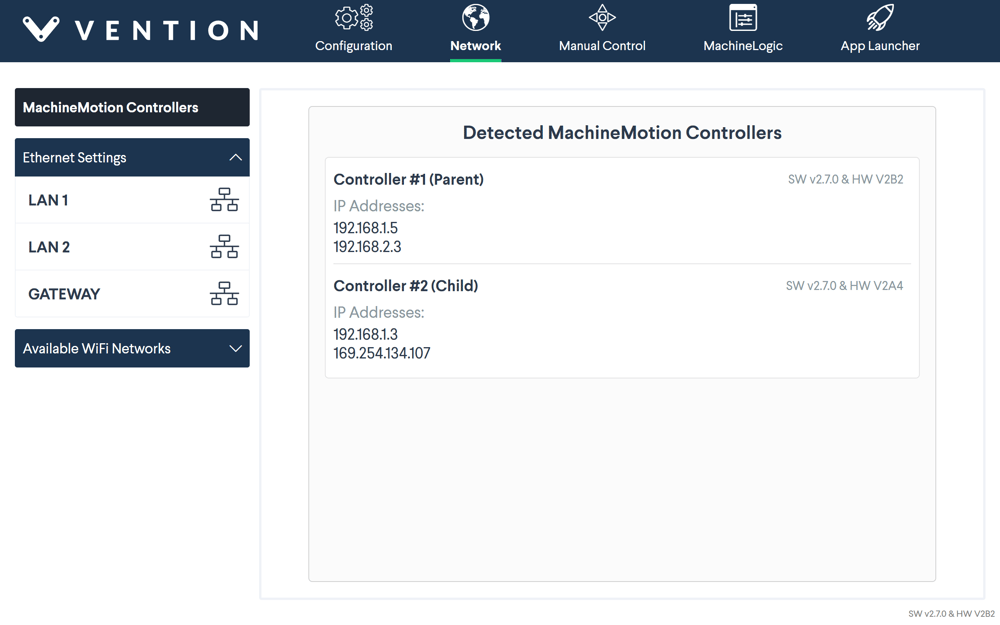
The network settings of all connected controllers can be verified in the MachineMotion Controllers tab found under the Network Connection tab.
Adding Additional Controllers to the Configuration
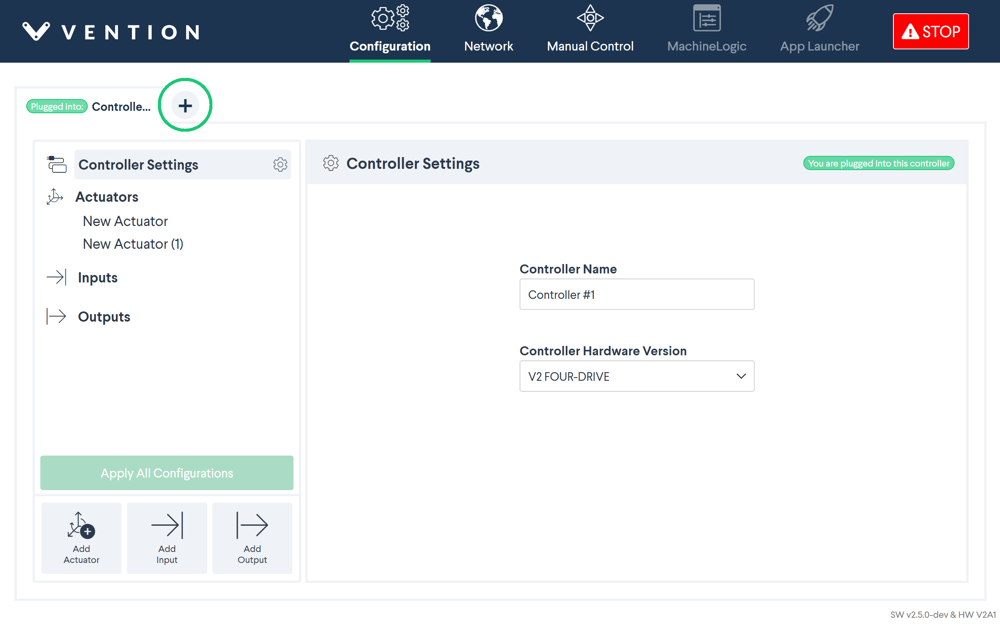
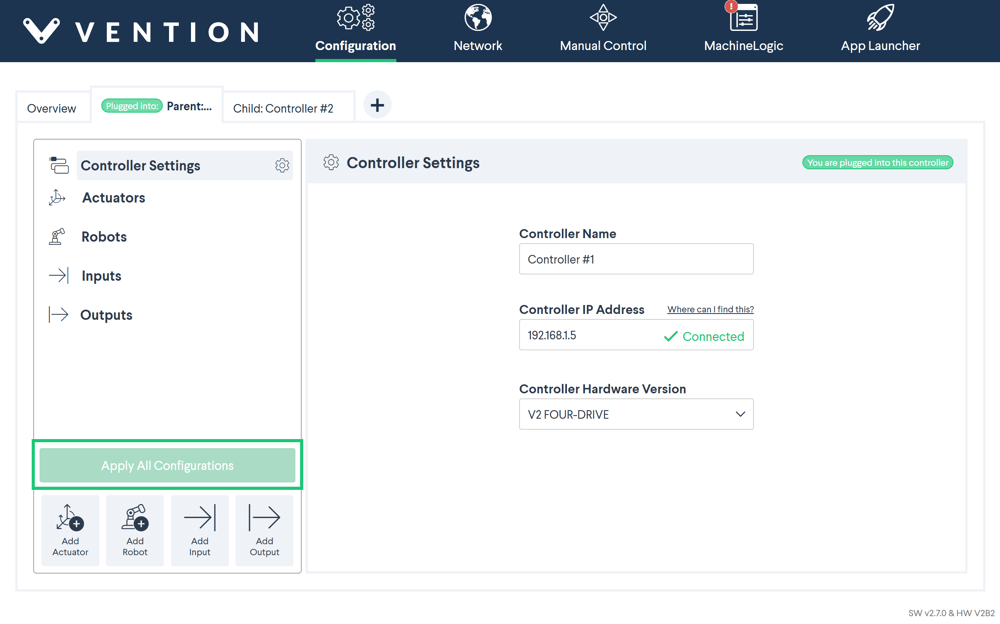
By default, a single controller is already present when accessing the Configuration tab. If the system in question features more than one MachineMotion controller, it must first be added in the Configuration.
- Step 1: Follow Steps 1 and 2 of the Power on and set-up section to connect to one of the MachineMotion controllers in the Multi-Controller system. The current controller tab should show a “Plugged into” label.
- Step 2: In the Configuration tab, click on the “+” button that is located directly beside the current controller tab. The Controller Settings page should appear for the newly added controller.
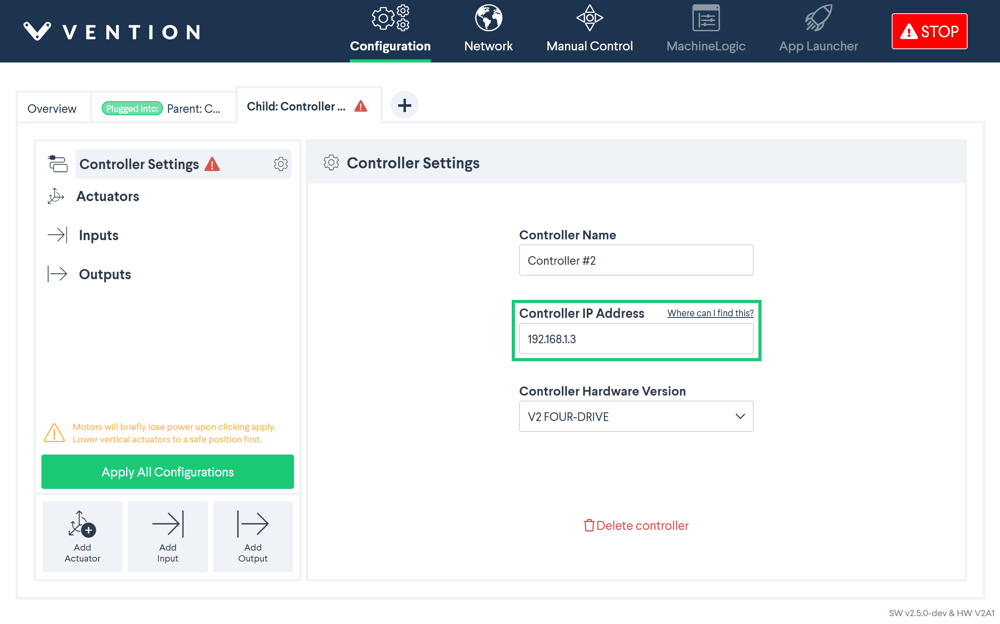
- Step 3: Fill in the Controller IP Address field with the IP address of the desired controller previously set in the Network Connection tab. Verify that the Controller Hardware Version also matches the controller. Optionally, the Controller Name can also be changed.
- Step 4: Repeat Steps 2 and 3 for each MachineMotion in the Multi-Controller system.
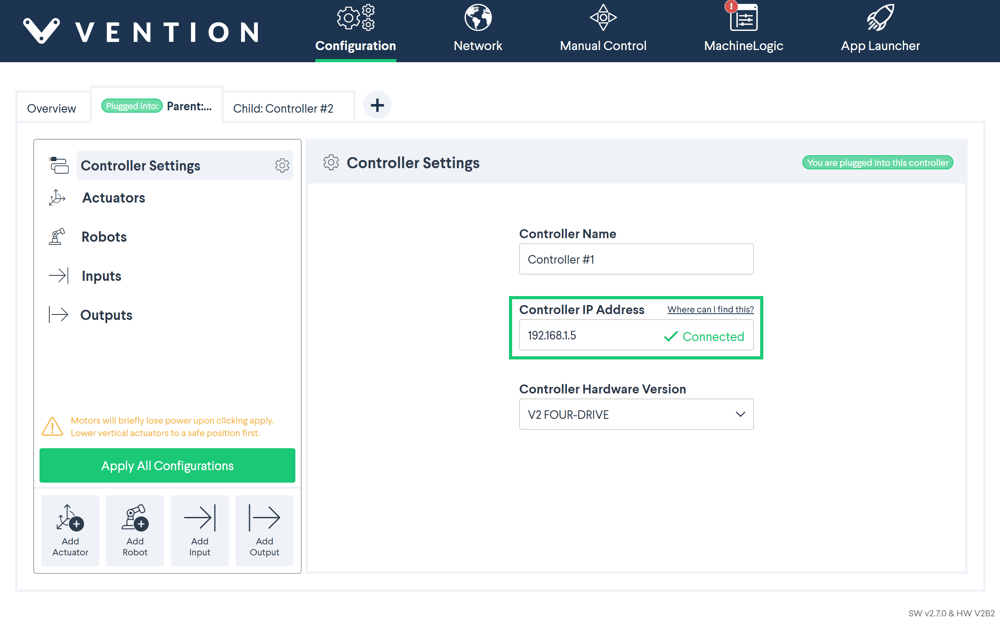
- Step 5: Verify the Controller IP address and Controller Hardware Version of the currently “Plugged into” controller is correct. Optionally, the Controller Name can also be changed.
- Step 6: Once satisfied with each individual Controller Settings, click the “Apply All Configurations” button. If all information was properly inputed, the individual warnings should no longer be displayed.
Parent-Child Relationship
Multi-Controller support relies on a Parent-Child relationship for communication between controllers. When first setting up a Multi-Controller system, the initial “Plugged into” controller is defaulted to the Parent. Every subsequent controller added to the configuration is set as a Child. When adding actuators, inputs and/or outputs to the configuration, this relationship becomes important.
- If “Plugged into” the Parent, actuators, inputs and/or outputs can be configured on any of the controllers in the system. For this reason, it is highly recommended that the PC or Pendant be always connected to the Parent controller.
- If “Plugged into” the Child, actuators, inputs and/or outputs can only be configured for the currently “Plugged into” controller.
Note: To change a Child to a Parent, you must be “Plugged into” the desired Child and click “Make this controller parent” in the “Plugged into” Controller Settings.
To continue programming in MachineLogic, the computer or pendant should be “Plugged into” the Parent controller.