Lab Automation Integration Guide
This document provides an overview of the integration and setup for a Kinova robot working in conjunction with Vention automated equipment controlled with MachineMotion, such as a range extender. Typical use cases for this setup include lab automation and research & development. See various configurations of lab automation equipment below.
Enclosed Range Extender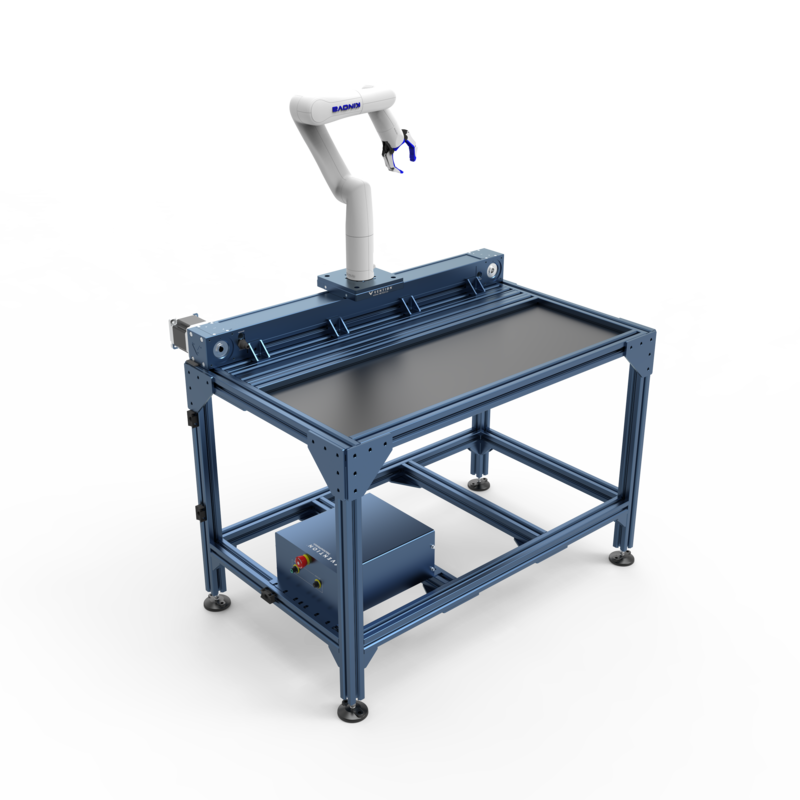 |
Overhead Range Extender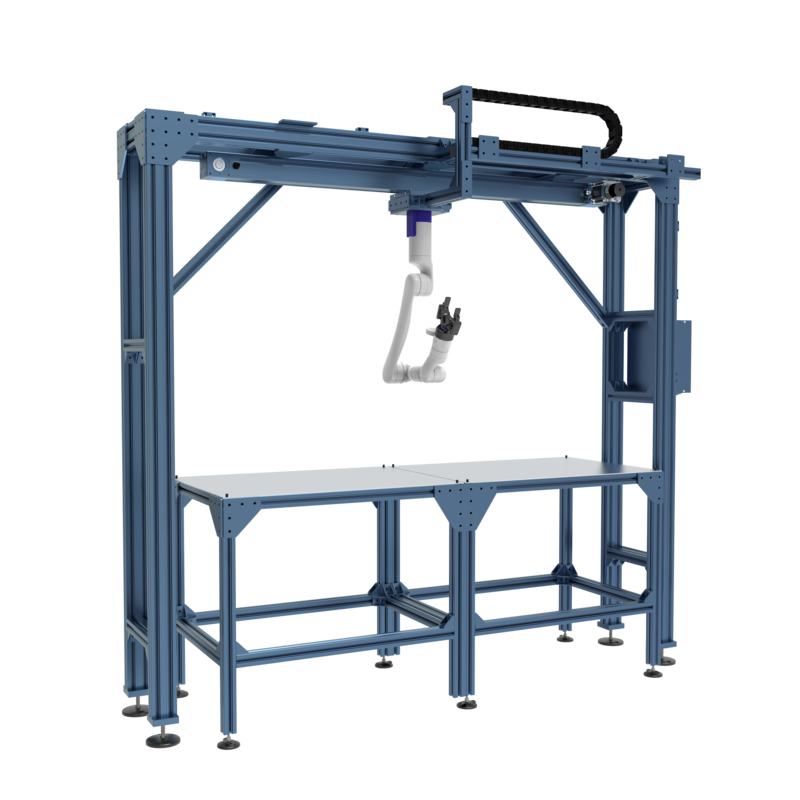 |
Robot Workstation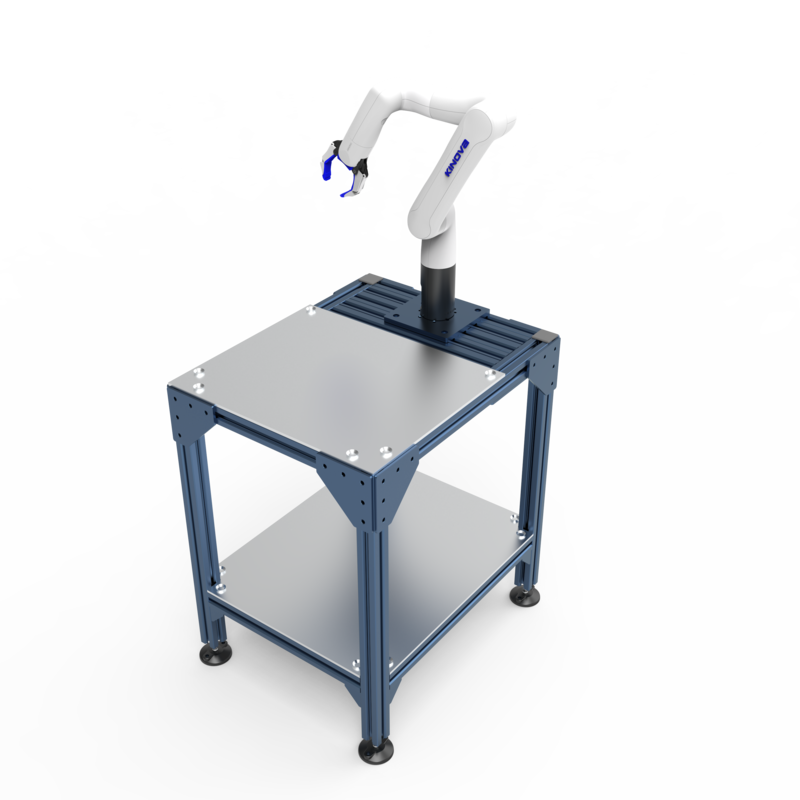 |
Upon completing the mechanical assembly of your robot cell, plan approximately 2 hours for the initial electrical and software configuration prior to programming. Note that a detailed version of this guide is available upon request for clients undertaking commissioning of their project.
Assemble the frame
- Start by assembling your robot cell frame according to the assembly instructions provided in your kit. Assembly time will vary based on the size and complexity of your mechanical design.
- Ensure that screws are properly tightened (13 Nm) and that your frame is leveled.
- Install sensors on the actuators according to the assembly instructions, when applicable.
Install the robot
- Attach the Kinova robot base controller to the Vention robot mounting plate (ST-RB-005-0004) by inserting the 4 fasteners (HW-FN-005-0011) included in the counter-bore holes on the bottom of the mounting plate.
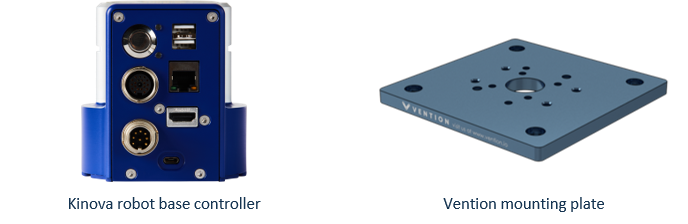
- Install the Kinova controller and mounting plate assembly at the location specified on your assembly drawings with the M8 fasteners and t-nuts included.
- Unfold the robot joints and move them slowly into a stable pose in order to mount the robot.
- Open the Kinova quick connect base shell clamp located on the bottom of the robot, slide the robot onto the base controller and close the clamp.
- Plug your robot into an electrical outlet.
Install MachineMotion
Install the MachineMotion controller on your assembly and follow the wiring diagram provided with your order. For more information, consult the MachineMotion controller installation guide and MachineMotion Controller Manual.
Configure the robot
There are 2 methods to configuring communication between your robot and the MachineMotion controller.
Method 1: Network to Robot
Create a network to control the Kinova robot and MachineMotion controller from your computer
The image below demonstrates the typical setup used for this configuration method.

- Connect all devices to a power outlet (MachineMotion controller, Kinova robot, router and PC).
- Power ON the MachineMotion controller by switching on the rocker switch. The status LED should display blue as it is booting up. Wait for the status LED to turn green (~ 90 seconds).
- Use an ethernet-to-usb cable to connect your MachineMotion controller to your PC by using the 192.168.7.2 port on your MachineMotion controller.
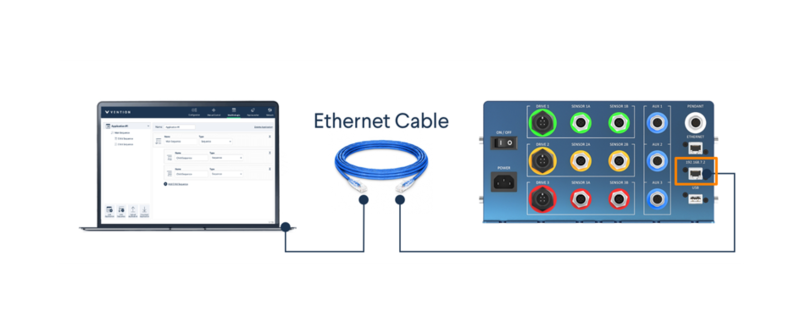
- Open Google Chrome web browser and browse to 192.168.7.2 to land on MachineMotion’s Control Center.
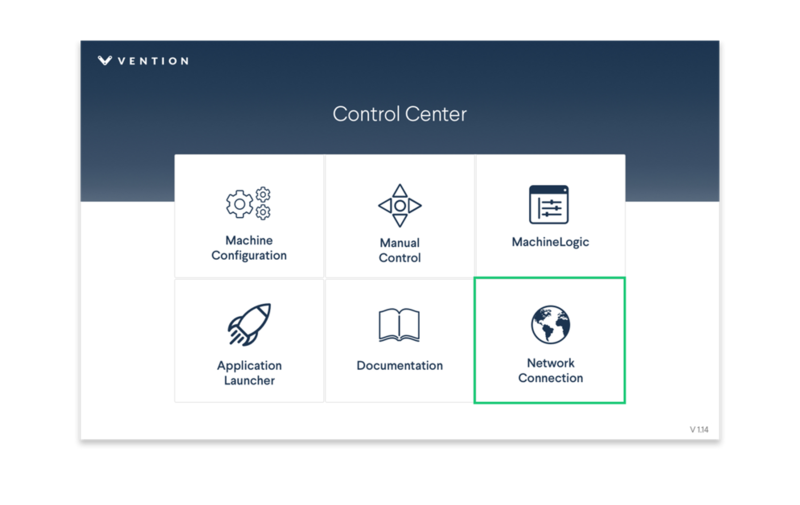
- Click on the Network Connection application item.
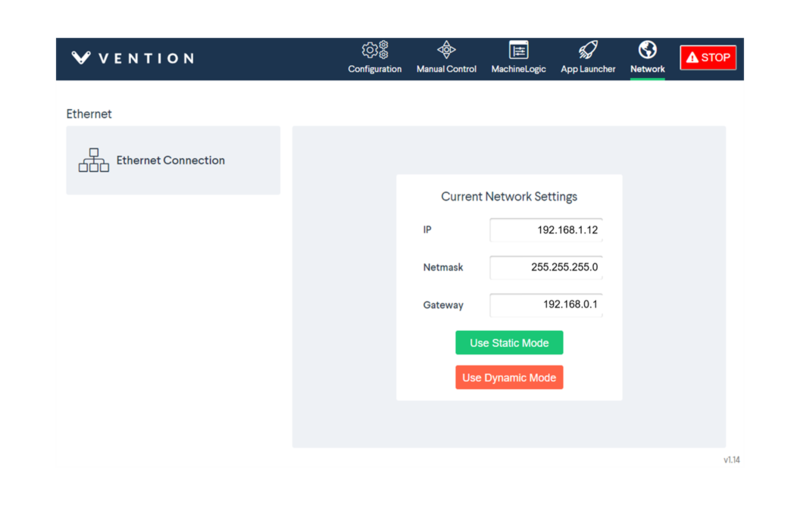
- Enter the IP, Netmask, and Gateway information as shown below and select Use Static Mode
- Disconnect the ethernet-to-usb cable from your PC.
- Connect your MachineMotion controller to the router using an ethernet cable from the MachineMotion controller port marked ETHERNET to any router ports. The MachineMotion controller will now be visible on the network as IP 192.168.1.12.
- Configure your router to have the following static IP address: 192.168.1.11 (refer to your router user manual). This static IP address is required for the router to control the robot.
- Connect your Kinova robot to the router using an ethernet cable.
- Use an ethernet-to-ethernet cable or a ethernet-to-USB cable to connect your router to your PC.
- Navigate to your router’s admin page and validate that there 3 devices on your network: the Kinova robot, the MachineMotion controller and the PC.
- pen your preferred python IDE and install the Kinova robot and MachineMotion python libraries
Method 2: MachineMotion controller to Kinova robot
Use the MachineMotion controller and the Cloud9 IDE directly with the Kinova robot
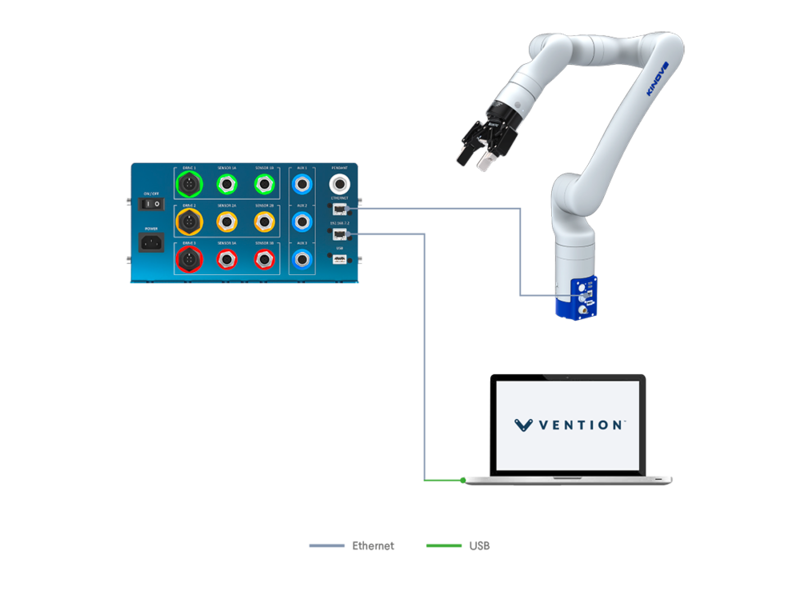
The image below demonstrates the typical setup used for this configuration method.
- Connect all devices to a power outlet (MachineMotion controller, Kinova robot, router and PC).
- Power ON the MachineMotion controller by switching on the rocker switch. The status LED should display blue as it is booting up. Wait for the status LED to turn green (~ 90 seconds).
- Use an ethernet-to-usb cable to connect your MachineMotion controller to your PC by using the 192.168.7.2 port on your MachineMotion controller.
- Open Google Chrome web browser and browse to 192.168.7.2 to land on MachineMotion’s Control Center.
- Click on the Network Connection application item.
- Enter the IP, Netmask, and Gateway information as shown below and select Use Static Mode
- Connect your Kinova robot using an ethernet cable from the MachineMotion controller port labelled ETHERNET.
- Navigate to 192.168.1.10 to make sure you are correctly connected to the robot through the MachineMotion controller.
- In your web browser, open Cloud9 by navigating to this address: http://192.168.7.2:3000/ide.html.
- Using Cloud 9, install the Kinova robot python libraries
- Install Kinova’s Kortex Python API by following the instructions provided here.